FYI - If you are comfortable with your current Gamma setup then just leave it as default and skip ahead to the Lighting section the default works as long as you understand how it affects your Normal and Displacement maps. You can also use the same lighting method for Corona.
Gamma
A big thanks to Zac Arato for providing me with most of technical information regarding linear workflow. I have just condensed this into a simple format for easy understanding.
Gamma
A big thanks to Zac Arato for providing me with most of technical information regarding linear workflow. I have just condensed this into a simple format for easy understanding.
Theres a few steps to this setup and ill do my best to explain how we come up with this workflow - let me know if you need clarification on anything.
I work with real estate photographers and retouchers, so consistent and accurate lighting/camera setup is crucial to our workflow.
I found the easiest way to handle gamma in max is to turn the LUT off.
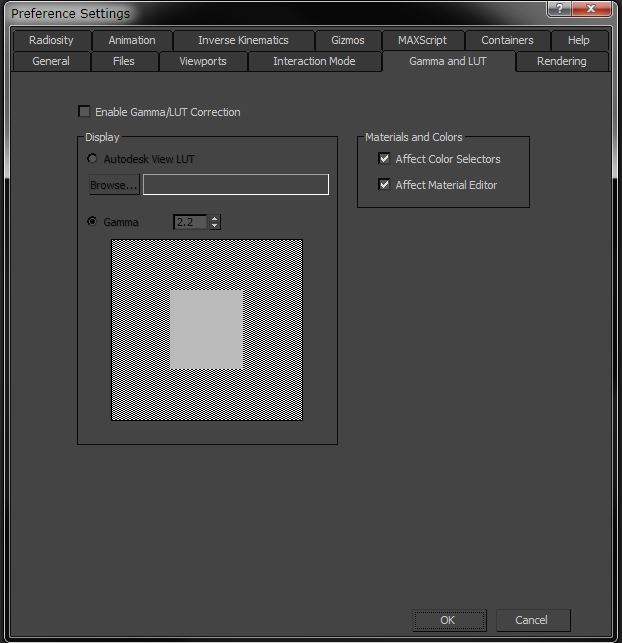
Reason being - it keeps everything input in max at 1.0 and output @ 1.0 and then you apply the 2.2 curve at the very end (sRGB button in the VFB). Saving as .exr also preserves this - so it will display automatically as 2.2 in post. The dual benefit is you can import anything from any scene with whatever gamma applied and it will correct this to a 1.0 input - thus any asset you merge into your scene will appear correctly as the jpg does 1:1
The next step is to tell Vray to do the same through color mapping
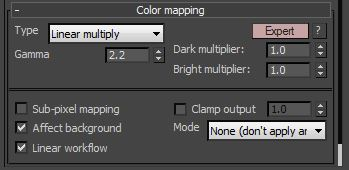
You will hear a lot of people scream about the 'linear workflow' button, ignore this for a moment. This simply keeps everything at 1.0 until you apply a sRGB curve.
Lighting
Lighting
Lets put into our Environment a HDRI. You can use a plain color - I prefer to use a HDRI because it mimics real world ambient lighting.
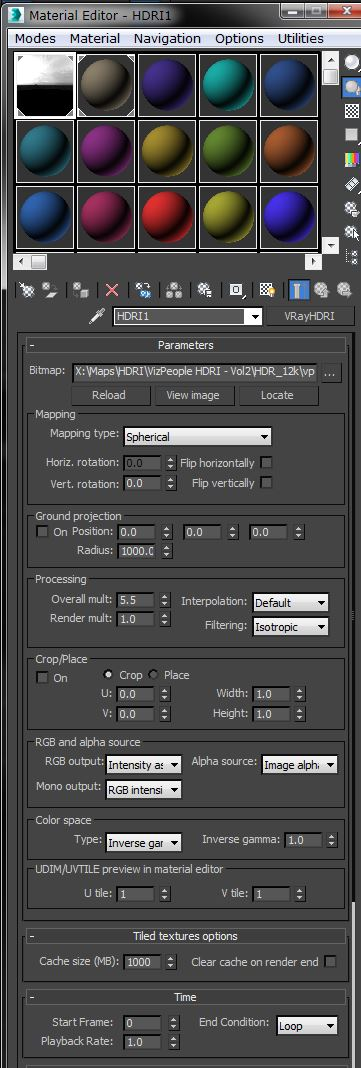
I am using \VizPeople HDRI - Vol2\HDR_12k\vp_HDRi_v2_08.hdr
Be aware, this is the only component you need to alter (overall mult: 1-10) depending on the intenisty of the image being used. Ill explain why in a moment. You will notice I have turned the RGB output to : Intensity as grey instead of default RGB color. This is because I dont want it to introduce any color - only for ambient.
You can now adjust your camera to a real world setting such as

Note: I spend alot of time trying to mimic 'real world camera settings' when in fact, after being on a photoshoot with a photographer I realised how little this actually really mattered - as they just shoot the photo and adjust the exposure generally after as it contains raw lighting and is the retouchers job. This is only really for consistency in max.
If you have this setup - you can now basically apply a Dulux Swatch to a plane and render it and it should be basically almost exact. The only difference being because im using a HDRI you may get some slight variation (slight). Example
Dulux Swatch - Army Issue

Render from camera top down

Ofcourse any lights you add will vary these values. Now to the second part, and something I also strive to perfect. Lighting....
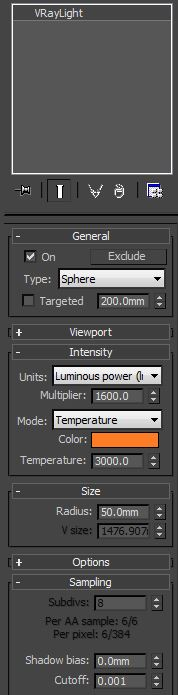
My recommendation is to not use arbitrary values in lights such as Multiplier of 1.0 etc... With your scene setup like this you can now use real world lumen values and they will appear as they do in real life.
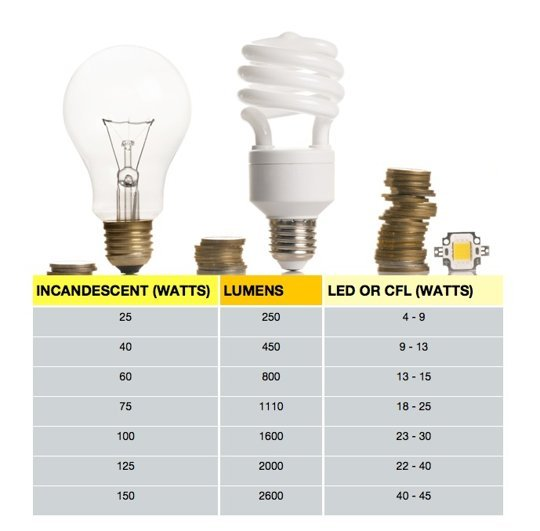

In a typical case Ill use a Halogen 100watt bulb with a Kelvin of 3000 (typical halogen). To keep it simple you only need to know the range of standard lights
40watt - 450 Lumen
60watt - 800 Lumen
100wat - 1600 Lumen etc...
And the Temperature (Kelvin) range:
2800 - Incandescent
3000 - Halogen
4500 - Natural White etc....
The only thing to note from this is your vray sun will appear extremely bright in this setup (as it uses arbitrary values) so you will need to have it set very low (0.02 - 0.1) depending on your camera shutter. You will understand as you play with this base setup.
I have this saved as my maxstart - so I never need to adjust anything unless I change the HDRI. I try keep it simple because this is what real estate photographers generally do (and it makes my life simple and work consistent for color/light matching). Once you change the HDRI you only need to do a few quick tests on a plane after adjusting the Overall Mult in the Processing section of the HDRI material.